Qt君最近在做图像相关的项目,用到了libjpeg库。记录libjpeg编译步骤供大家参考。
1.下载源码(jpegsrc9c.zip)
- 官网地址:
1
http://www.ijg.org/
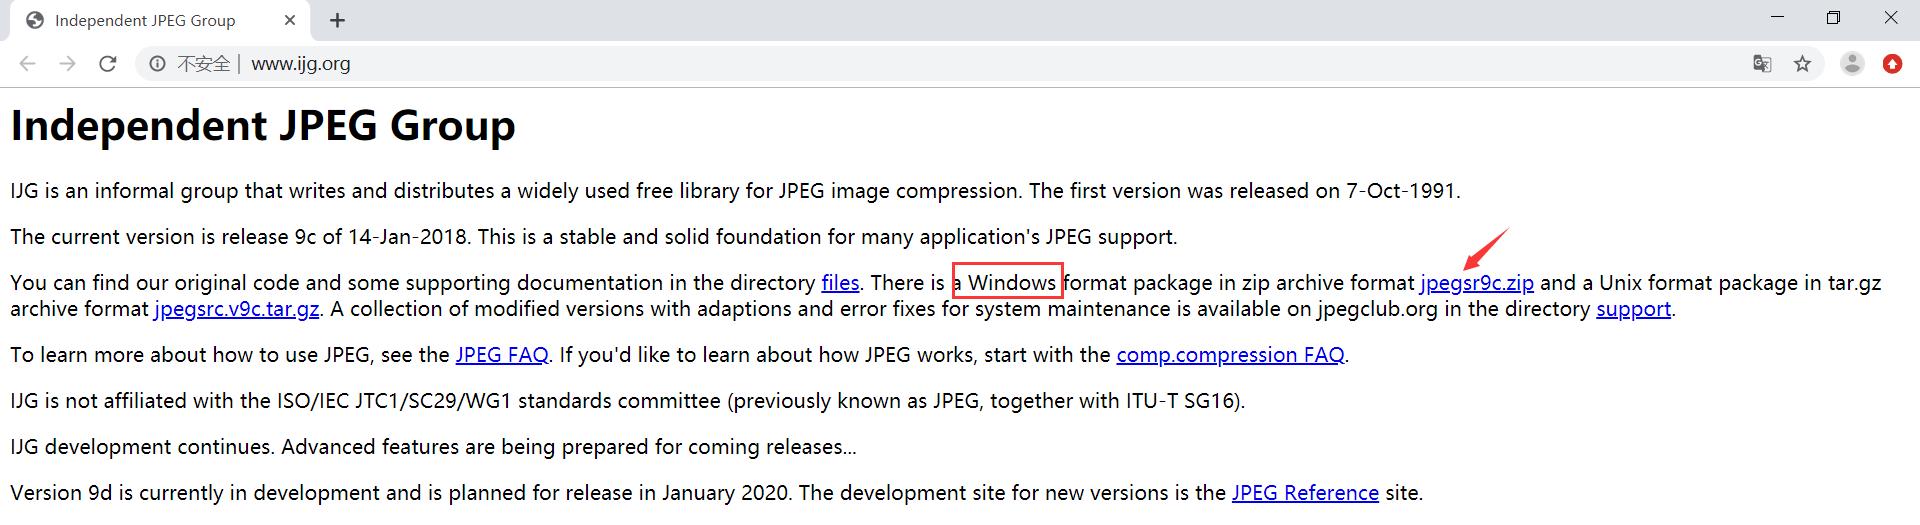
jepgsrc9c.zip源码包下载地址:
1
http://www.ijg.org/files/jpegsr9c.zip
如上的下载地址失效可以使用Qt君的github仓库下载:
1
https://github.com/aeagean/LibjpegForWindows/blob/master/jpeg-9c/jpegsr9c.zip
2.如何找到编译配置方法?
下载的源码中有一个编译安装教程文件(install.txt)
从install.txt中摘取的VC++6配置编译方法:
1
2
3
4
5
6
7
8
9
10
11
12
13
14
15
16
Microsoft Windows, Microsoft Visual C++ 6 Developer Studio:
To use:
1. Open the command prompt, change to the main directory and execute the
command line
NMAKE /f makefile.vs setup-vc6
This will move jconfig.vc to jconfig.h and makefiles to project files.
(Note that the renaming is critical!)
2. Open the workspace file jpeg.dsw, build the library project.
(If you are using Developer Studio more recent than 6.0, you'll
probably get a message saying that the project files are being updated.)
3. Open the workspace file apps.dsw, build the application projects.
4. To perform the self-test, execute the command line
NMAKE /f makefile.vs test-build
5. Move the application .exe files from `app`\Release to an
appropriate location on your path.从install.txt中摘取的VS2017配置编译方法:
1
2
3
4
5
6
7
8
9
10
11
12
13
14
15
16
17
18
19
20
21
Microsoft Windows, Visual Studio 2017 (v15):
To use:
1. Open the Developer Command Prompt, change to the main directory and
execute the command line
NMAKE /f makefile.vs setup-v15
This will move jconfig.vc to jconfig.h and makefiles to project files.
(Note that the renaming is critical!)
2. Open the solution file jpeg.sln, build the library project.
a) If you are using Visual Studio more recent than
2017 (v15), you'll probably get a message saying
that the project files are being updated.
b) If necessary, open the project properties and
adapt the Windows Target Platform Version in
the Configuration Properties, General section;
we support the latest version at the time of release.
3. Open the solution file apps.sln, build the application projects.
4. To perform the self-test, execute the command line
NMAKE /f makefile.vs test-build
5. Move the application .exe files from `app`\Release to an
appropriate location on your path.
3.以编译VS2017版本为例
由于VC++6的编译方法与VS2017方法基本相同,这里使用VS2017的编译环境编译。
3.1 编译步骤
1. 打开VS2017开发者终端,主要是使用VS2017的开发环境。
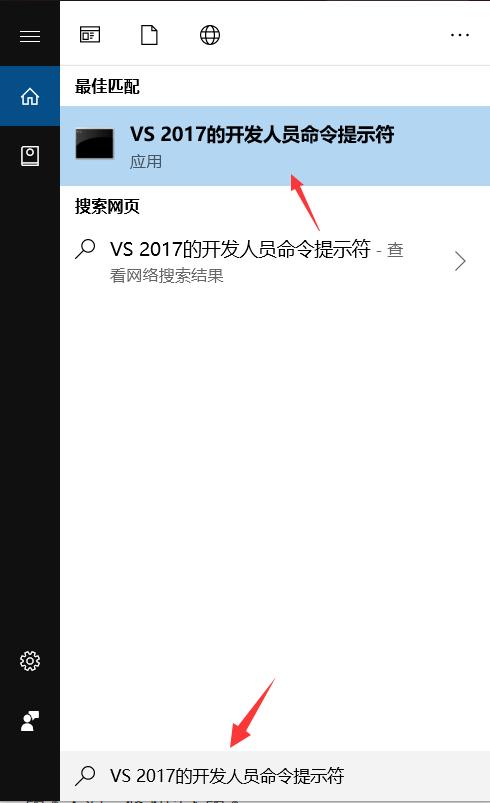
2. 进入libjpeg库目录,使用NMAKE命令生成VS2017的项目文件(用于编译libjpeg库)。
图示: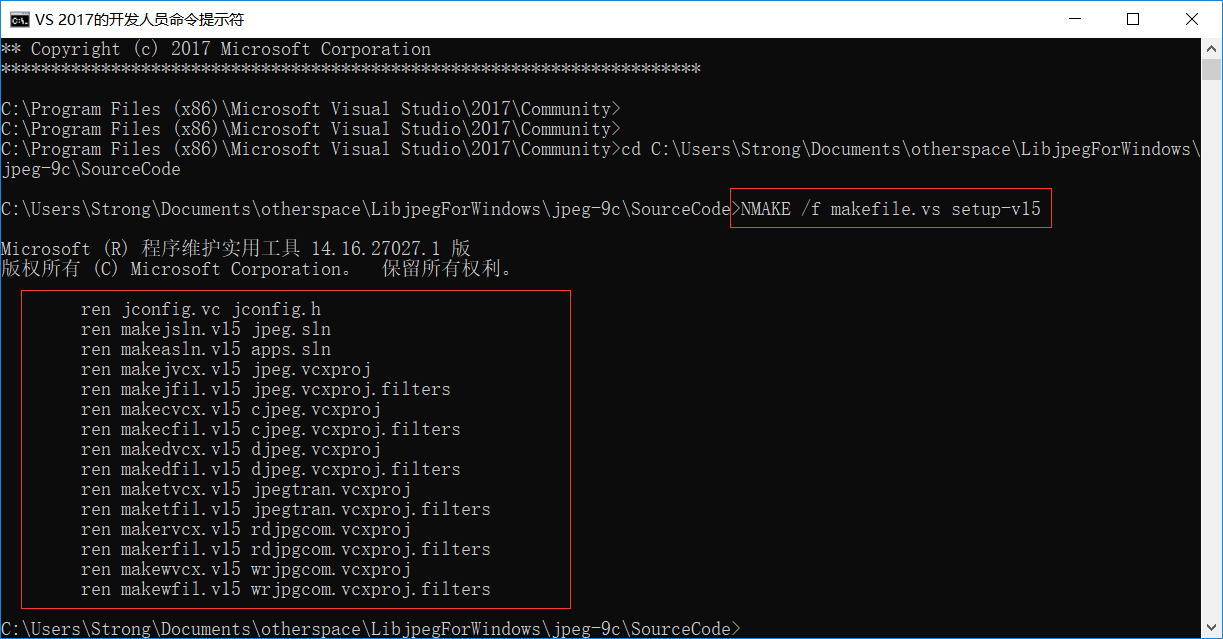
命令:1
NMAKE /f makefile.vs setup-v15
这一步可能遇到的问题:如果出现以下情况,可能是你重复调用命令生成,导致文件不能重命名,或你修改了里面的一些文件名字。建议重新解压libjpeg库再执行命令生成。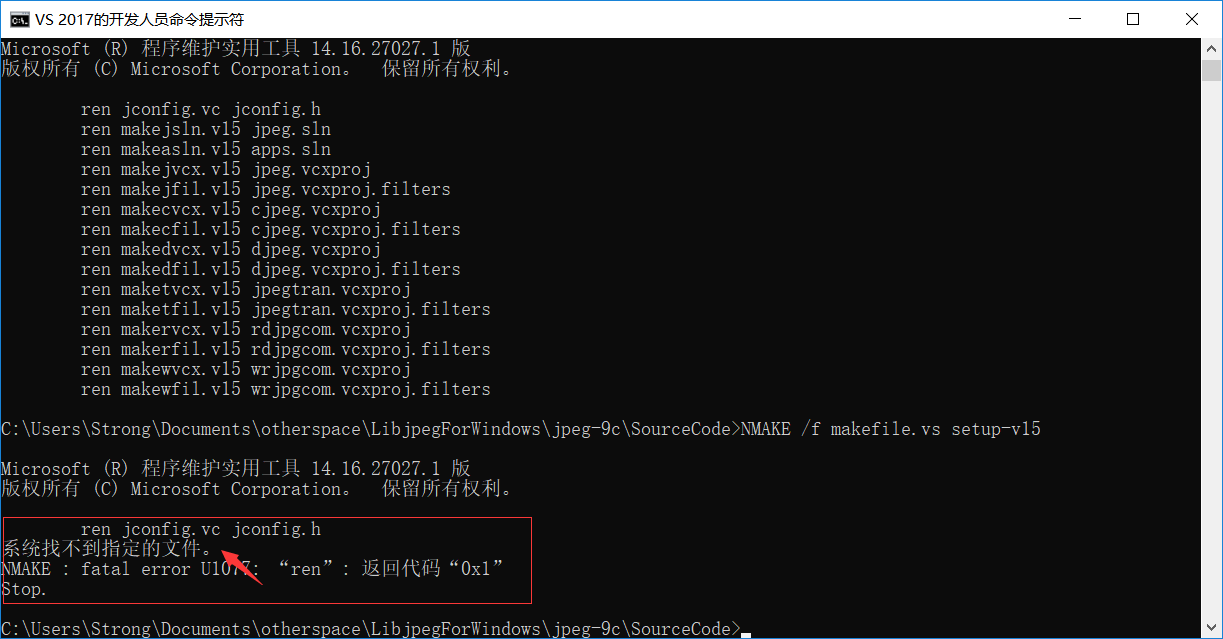
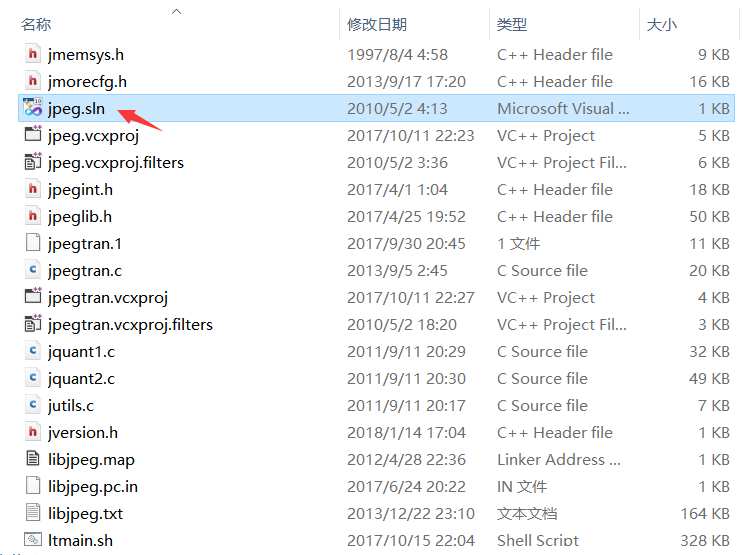
3. 打开libjpeg库目录的jpeg.sln项目文件。
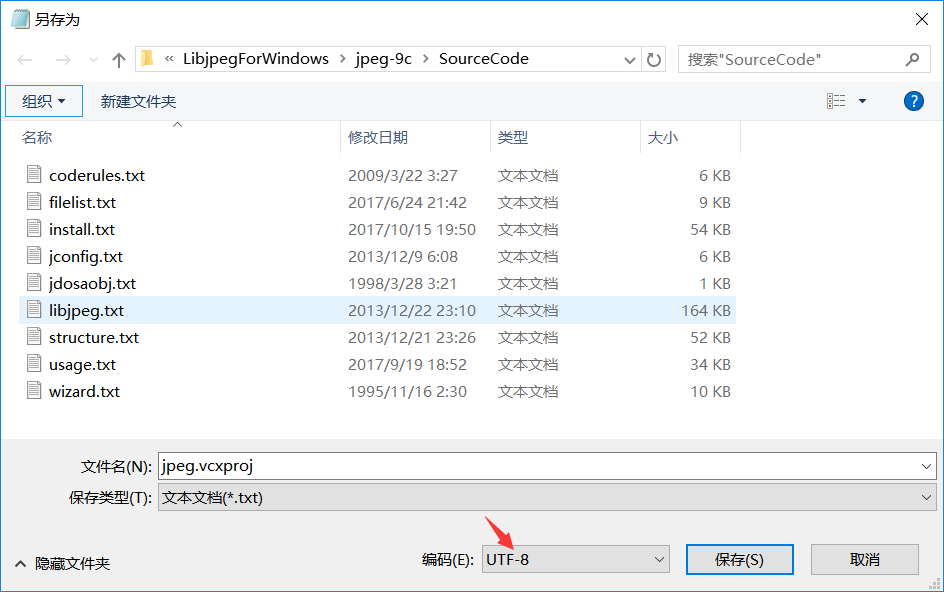
这一步可能遇到的问题:1
2jpeg.vcxproj.filters : warning : 无法读取筛选器文件“jpeg.vcxproj.filters”。请卸载项目“jpeg.vcxproj”以便对其进行编辑。
jpeg.vcxproj.filters(1,1): 未能加载项目文件。根级别上的数据无效。 第 1 行,位置 1。
解决方法:
- 使用记事本打开jpeg.vcxproj删除第1行的第1个位置的乱码字符;
- 另存为UTF-8格式并覆盖jpeg.vcxproj文件。
- 相似的问题可以使用同样的方法解决。
4. 编译
这一步可能遇到的问题:
- Windows SDK版本不匹配的问题。

解决方法:修改Windows SDK版本: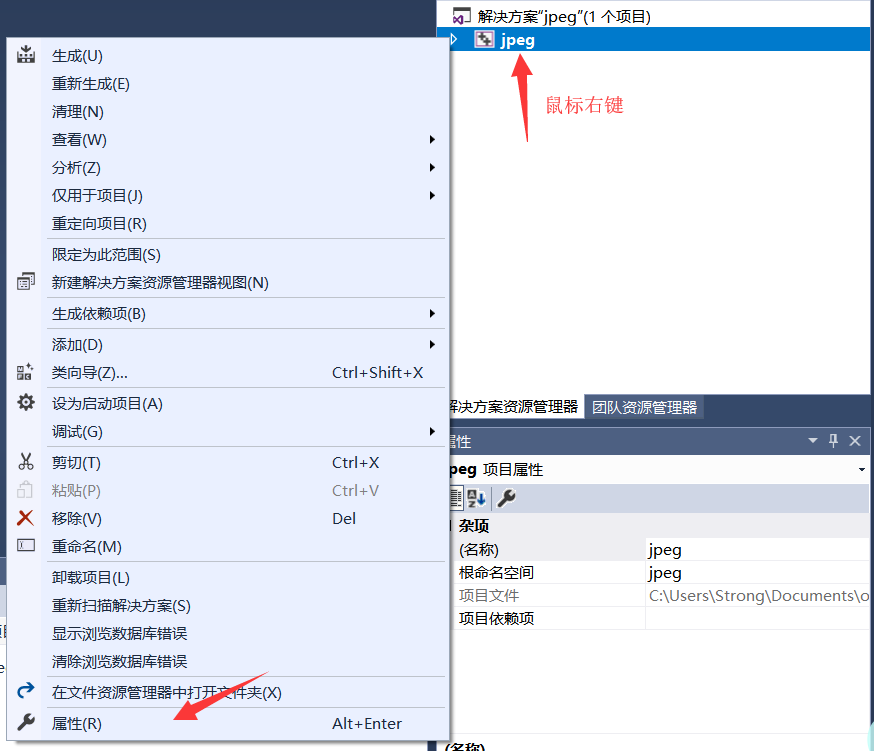

- 提示必须定义入口点的问题:
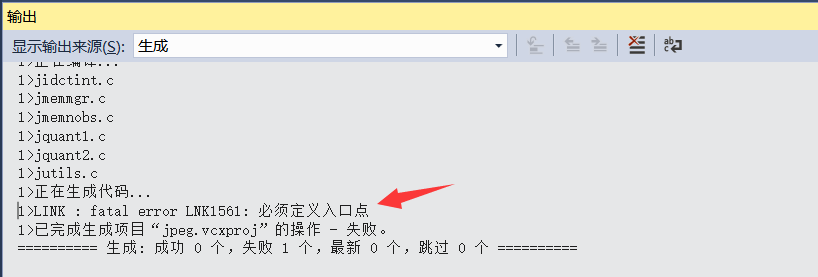
解决方法:设置动态库或静态库: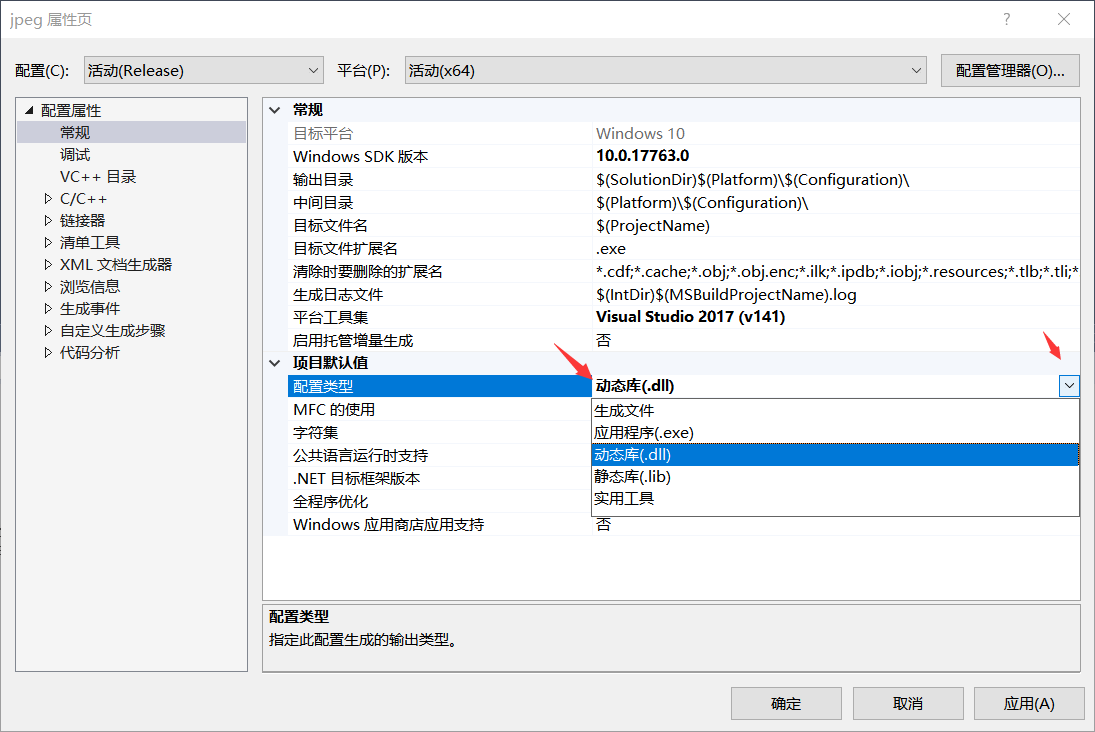
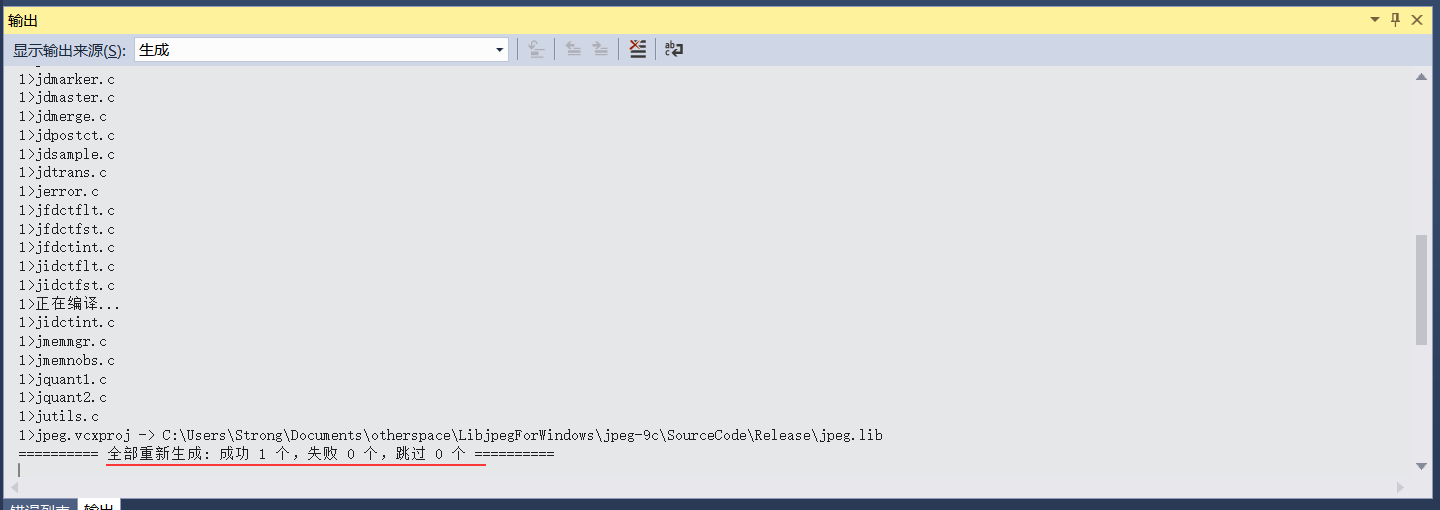
3.2 最后编译成功
4.打包好的库和头文件
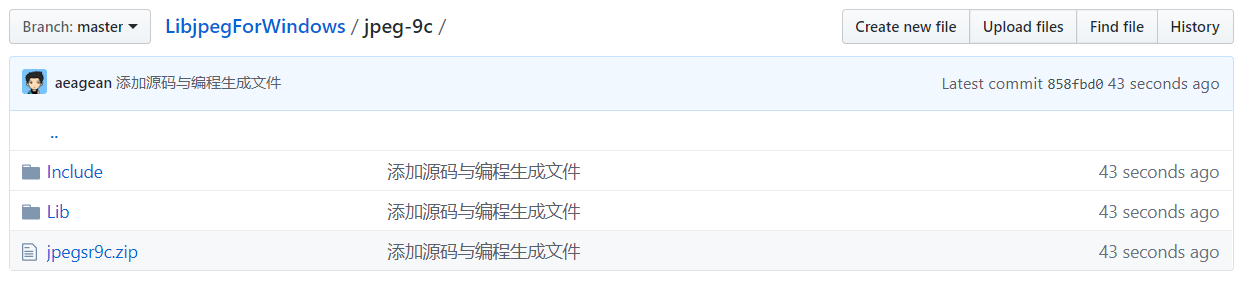
- 仅供学习使用。
- 32位与64位的release版本静态库。
- 地址:
1
https://github.com/aeagean/LibjpegForWindows