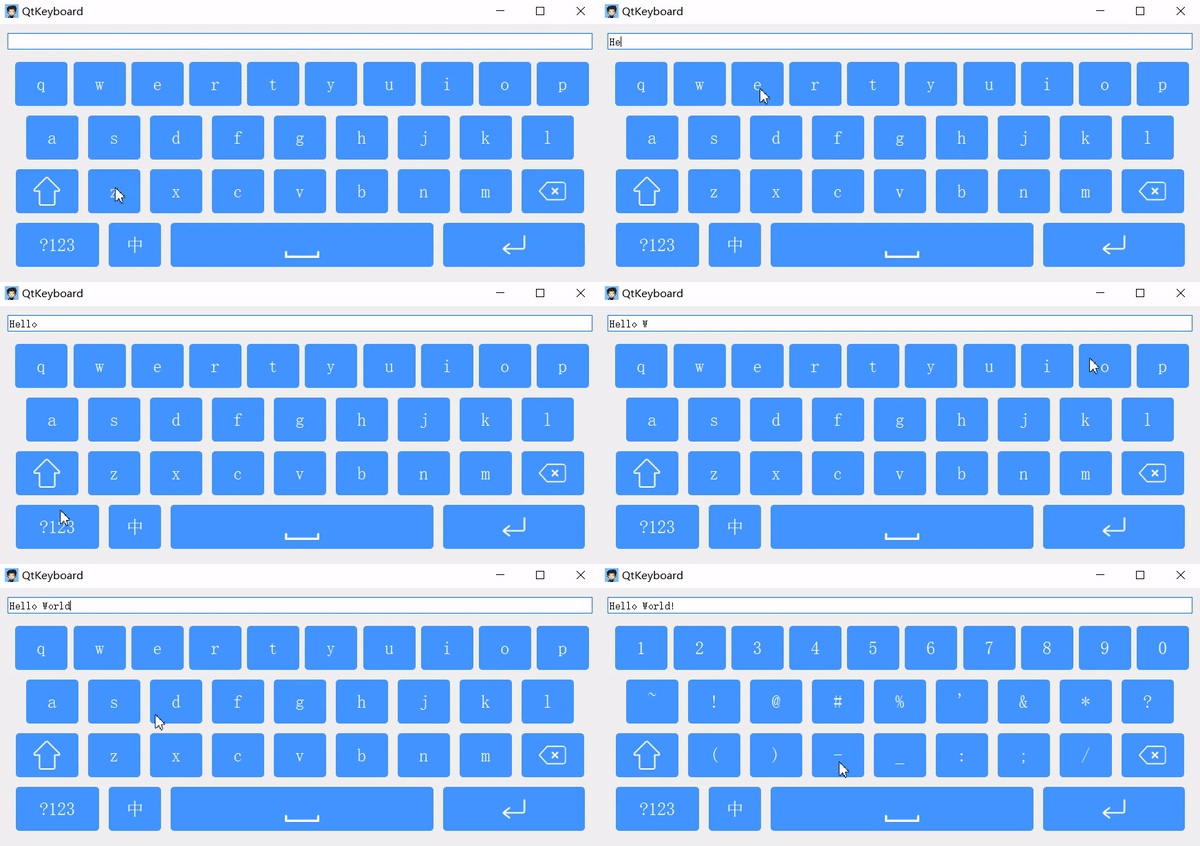
介绍该键盘项目的代码实现。

1.布局
采用垂直布局1
2
3
4
5
6
7
8
9
10
11
12
13
14
15QHBoxLayout *h1();
QHBoxLayout *h2();
QHBoxLayout *h3();
QHBoxLayout *h4();
QVBoxLayout *layout = new QVBoxLayout();
layout->setSpacing(BUTTON_SPACING_RATIO*height());
layout->addLayout(h1());
layout->addLayout(h2());
layout->addLayout(h3());
layout->addLayout(h4());
mainLayout->addStretch();
mainLayout->addLayout(layout);
mainLayout->addStretch();
2.KeyButton生成
- 从第一行的键盘布局代码中可以看到,使用for循环创建KeyButton。
1
2
3
4
5
6
7
8
9
10
11QHBoxLayout *Keyboard::h1()
{
QHBoxLayout *h = new QHBoxLayout;
...
for (int i = 0; i < modeListBar1.count(); i++) {
KeyButton *button = createButton(modeListBar1.at(i));
h->addWidget(button);
}
...
}

- 创建createButton中传递按键的三个状态信息(以第一行为例)。
1
2
3
4
5
6
7KeyButton *Keyboard::createButton(QList<KeyButton::Mode> modes)
{
KeyButton *button = new KeyButton(modes, this);
button->onReponse(this, SLOT(onKeyPressed(const int&, const QString&)));
button->setSizePolicy(QSizePolicy::Fixed, QSizePolicy::Fixed);
return button;
}

- 每一行内容分别分为小写状态,大写状态,字符状态。
1
2
3
4
5
6
7
8
9
10
11
12const QList<Modes> modeListBar1 = {
{{Qt::Key_Q, "q"}, {Qt::Key_Q, "Q"}, {Qt::Key_1, "1"}},
{{Qt::Key_W, "w"}, {Qt::Key_W, "W"}, {Qt::Key_2, "2"}},
{{Qt::Key_E, "e"}, {Qt::Key_E, "E"}, {Qt::Key_3, "3"}},
{{Qt::Key_R, "r"}, {Qt::Key_R, "R"}, {Qt::Key_4, "4"}},
{{Qt::Key_T, "t"}, {Qt::Key_T, "T"}, {Qt::Key_5, "5"}},
{{Qt::Key_Y, "y"}, {Qt::Key_Y, "Y"}, {Qt::Key_6, "6"}},
{{Qt::Key_U, "u"}, {Qt::Key_U, "U"}, {Qt::Key_7, "7"}},
{{Qt::Key_I, "i"}, {Qt::Key_I, "I"}, {Qt::Key_8, "8"}},
{{Qt::Key_O, "o"}, {Qt::Key_O, "O"}, {Qt::Key_9, "9"}},
{{Qt::Key_P, "p"}, {Qt::Key_P, "P"}, {Qt::Key_0, "0"}},
};

- 根据传递的信息默认显示小写状态的内容。
1
2
3
4
5
6
7
8
9
10
11KeyButton::KeyButton(const QList<KeyButton::Mode> modes, QWidget *parent) :
QPushButton(parent)
{
...
if (!modes.isEmpty()) {
m_preMode = m_mode = m_modes.first();
setText(m_mode.display);
}
connect(this, SIGNAL(pressed()), this, SLOT(onPressed()));
}
3.按键状态切换
- 键盘存在三种形态,小写状态,大写状态,字符状态。
- 一个按键存在三种状态,意味按键有三种状态切换,当键盘Keyboard类绑定切换状态的按键,进行响应的操作。当键盘Keyboard类绑定切换状态的按键,进行响应的操作。
通过按键的状态值来绑定Keyboard的处理信号(switchCapsLock(),switchSpecialChar())。
1
2
3
4
5
6
7
8
9
10
11
12
13
14
15
16
17
18
19
20
21
22
23
24
25
26
27
28
29void Keyboard::resizeButton()
{
foreach (KeyButton *button, findChildren<KeyButton *>()) {
...
switch (button->mode().key) {
case Qt::Key_CapsLock:
...
connect(button,
SIGNAL(pressed()),
this,
SLOT(switchCapsLock()),
Qt::UniqueConnection);
break;
case Qt::Key_Mode_switch:
...
connect(button,
SIGNAL(pressed()),
this,
SLOT(switchSpecialChar()),
Qt::UniqueConnection);
break;
default:
break;
}
}
...
}触发切换大写状态,遍历设置每个按键的switchCapsLock()函数。
1
2
3
4
5
6void Keyboard::switchCapsLock()
{
QList<KeyButton *> buttons = findChildren<KeyButton *>();
foreach(KeyButton *button, buttons)
button->switchCapsLock();
}KeyButton的switchCapsLock()函数切换按键显示的内容。
1
2
3
4
5
6
7
8
9void KeyButton::switchCapsLock()
{
if (m_mode.type == SpecialChar)
return;
m_preMode = m_mode;
m_mode = find(m_mode.type == LowerCase ? UpperCase : LowerCase);
setText(m_mode.display);
}
4.发送模拟事件到焦点窗口
当创建按键的同时也会绑定AbstractKeyboard的onKeyPressed槽函数。
1
2KeyButton *button = new KeyButton(modes, this);
button->onReponse(this, SLOT(onKeyPressed(const int&, const QString&)));使用QApplication的sendEvent发送按键事件到焦点窗口。
1
2
3
4
5
6
7
8
9
10
11
12void AbstractKeyboard::onKeyPressed(int key, QString value)
{
QWidget *receiver = QApplication::focusWidget();
if (!receiver)
return;
QKeyEvent keyPress(QEvent::KeyPress, key, Qt::NoModifier, value);
QKeyEvent keyRelease(QEvent::KeyRelease, key, Qt::NoModifier, value);
QApplication::sendEvent(receiver, &keyPress);
QApplication::sendEvent(receiver, &keyRelease);
}