我们使用QUrl装载url请求的时候,往往需要写参数,但是由于Qt4与Qt5的改动导致QUrl接口也会不一样。
1 | http://www.example.com?key1=value1&key2=value2 |
Qt4写法
1 | QUrl url("http://www.example.com"); |
Qt5写法
1 | QUrl url("http://www.example.com"); |
兼容Qt4/Qt5写法
1 | QUrl url("http://www.example.com"); |
我们使用QUrl装载url请求的时候,往往需要写参数,但是由于Qt4与Qt5的改动导致QUrl接口也会不一样。
1 | http://www.example.com?key1=value1&key2=value2 |
1 | QUrl url("http://www.example.com"); |
1 | QUrl url("http://www.example.com"); |
1 | QUrl url("http://www.example.com"); |
有时候我们编译程序完成后需要执行某些操作,比如复制执行文件或库文件到指定目录,如果这些都靠手动复制,未免会太繁琐且容易出错。本文介绍使用Qmake工具编译完成后自动执行自定义脚本的方法。
1 | QMAKE_POST_LINK += cmd_line1 cmd_line2 |
1 | QMAKE_PRE_LINK += cmd_line1 cmd_line2 |
命令
1 | BEFORE_LINK_CMD_LINE = echo Hello world! |
Hello world!在程序链接前输出。
Build Success!在程序链接(编译完成)后输出。1 | g++ -c -pipe -g -std=gnu++0x -Wall -W -D_REENTRANT -fPIC -DQT_QML_DEBUG -DQT_CORE_LIB -I../untitled -I. -I../../Tools/Qt5.6.3/5.6.3/gcc_64/include -I../../Tools/Qt5.6.3/5.6.3/gcc_64/include/QtCore -I. -I../../Tools/Qt5.6.3/5.6.3/gcc_64/mkspecs/linux-g++ -o main.o ../untitled/main.cpp |
利用DATE与TIME编译宏特性为Qt程序添加编译日期时间。
1 | static const QDateTime buildDateTime() |
另外,下列代码并不能获取编译日期时间,而是获取程序运行当前的日期时间。1
QDateTime::currentDateTime()
写Linux应用时用到睡眠函数,比如sleep,usleep,但是将应用移植到Windows系统却是编译错误。本文解决Linux与Windows睡眠函数的兼容性问题。

1 |
1 | static void usleep(unsigned long usec) |
1 |
|
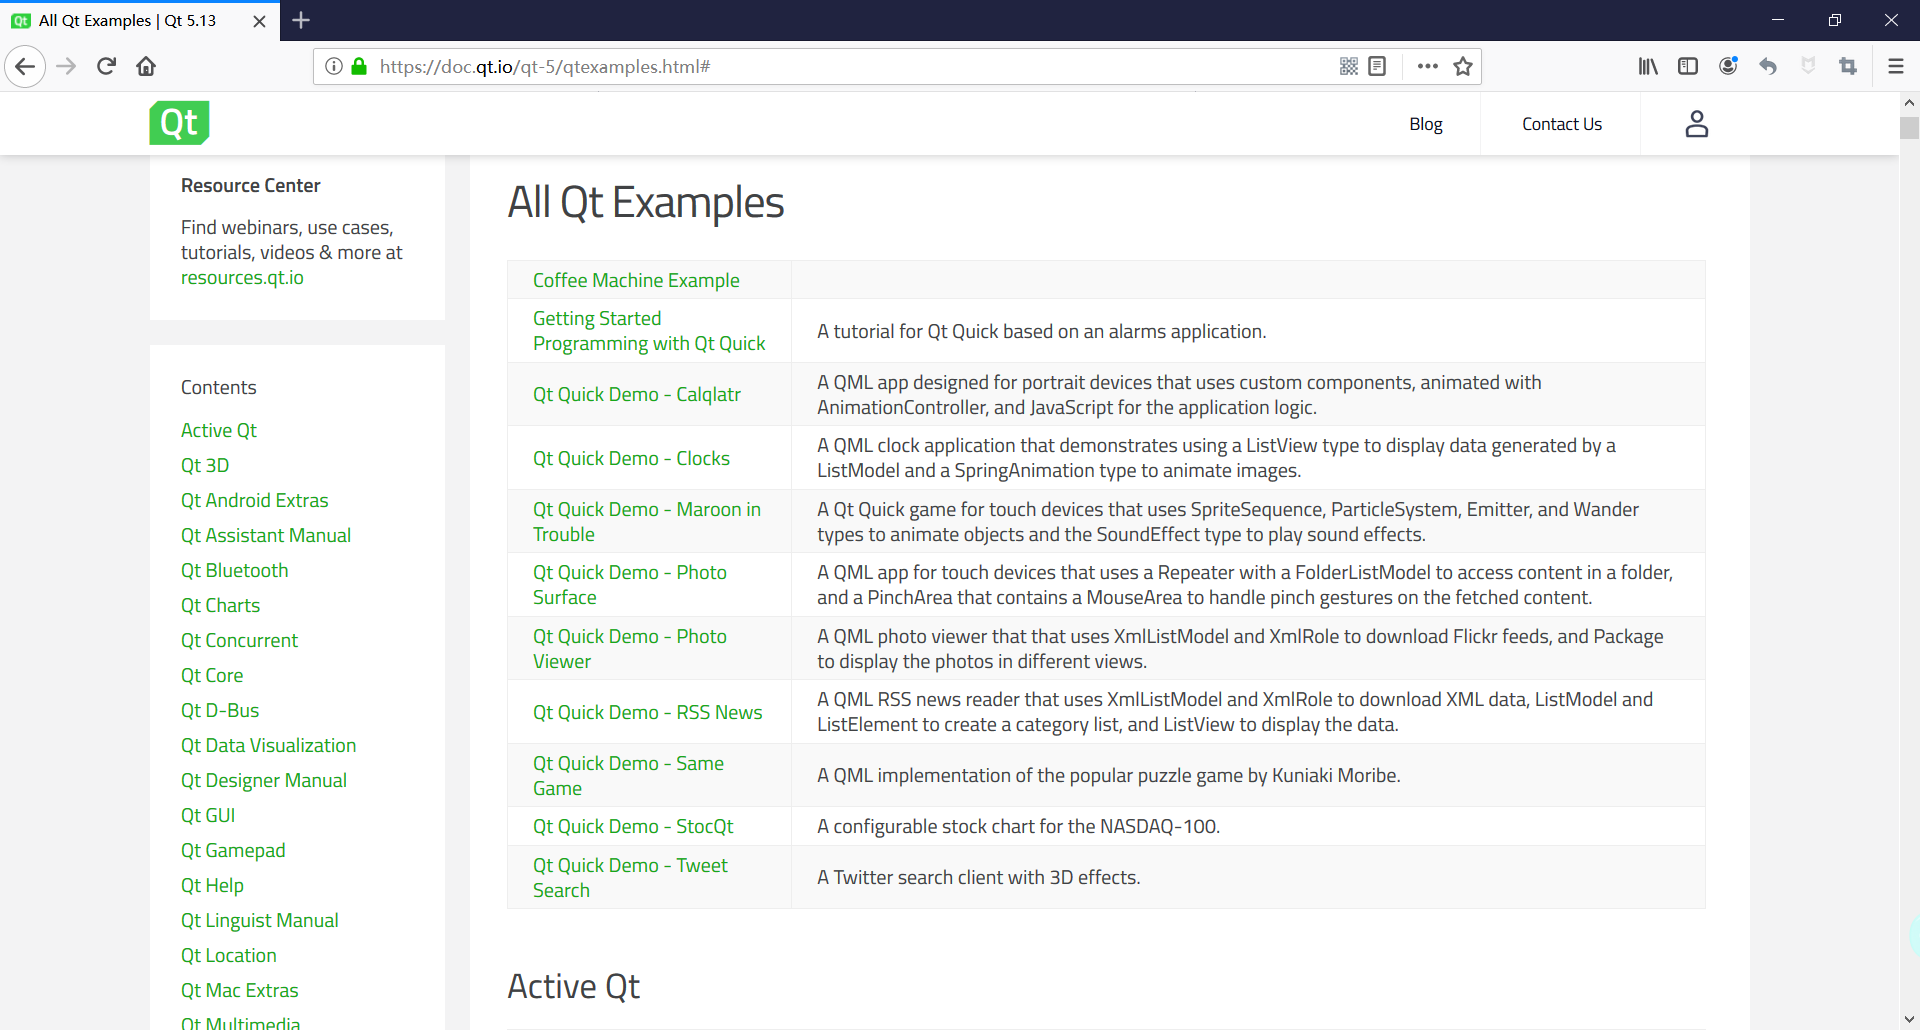
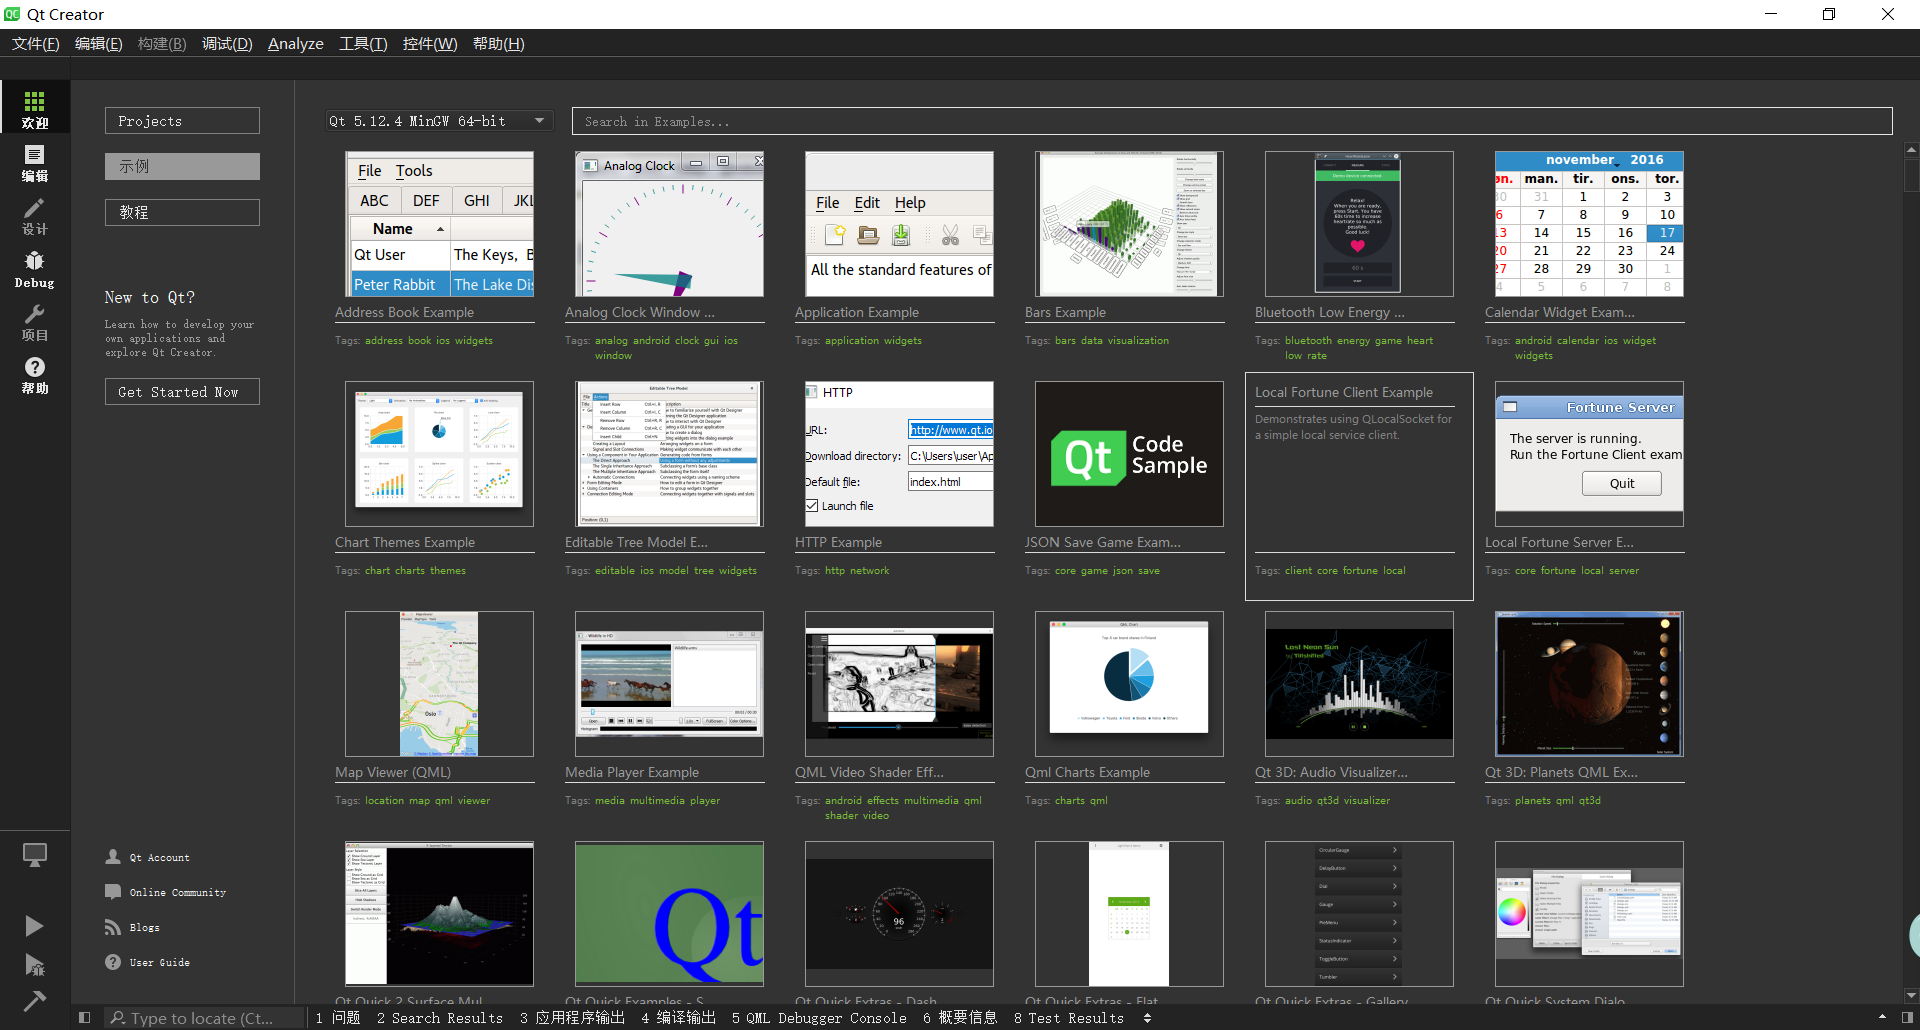
Qt的官方例子很多都是经过历史沉淀,简单易学,都是很好的学习例子,所以Qt君收集一些Qt官方示例的使用方法,供大家一起学习。
1 | https://doc.qt.io/qt-5/qtexamples.html# |
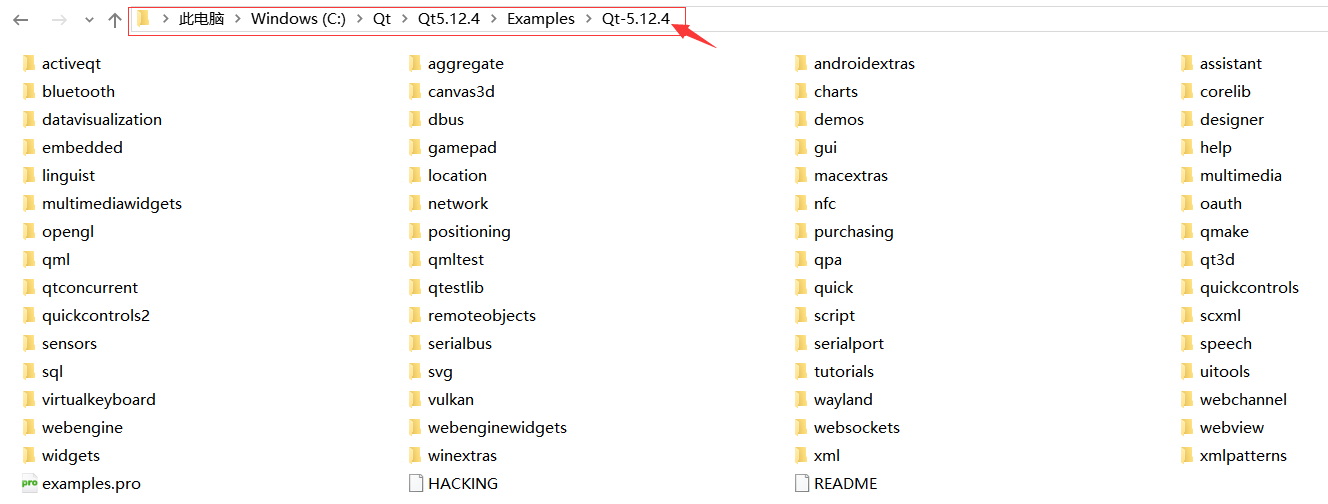
1 | C:\Qt\Qt5.12.4\Examples\Qt-5.12.4 |
Github仓库
1 | https://github.com/aeagean/QtOfficialExamples |
下载地址
1 | https://github.com/aeagean/QtOfficialExamples/archive/master.zip |
后续Qt君会不定期更新对Qt官方例子的分析讲解。
介绍该键盘项目的代码实现。
采用垂直布局1
2
3
4
5
6
7
8
9
10
11
12
13
14
15QHBoxLayout *h1();
QHBoxLayout *h2();
QHBoxLayout *h3();
QHBoxLayout *h4();
QVBoxLayout *layout = new QVBoxLayout();
layout->setSpacing(BUTTON_SPACING_RATIO*height());
layout->addLayout(h1());
layout->addLayout(h2());
layout->addLayout(h3());
layout->addLayout(h4());
mainLayout->addStretch();
mainLayout->addLayout(layout);
mainLayout->addStretch();
1 | QHBoxLayout *Keyboard::h1() |

1 | KeyButton *Keyboard::createButton(QList<KeyButton::Mode> modes) |

1 | const QList<Modes> modeListBar1 = { |

1 | KeyButton::KeyButton(const QList<KeyButton::Mode> modes, QWidget *parent) : |
通过按键的状态值来绑定Keyboard的处理信号(switchCapsLock(),switchSpecialChar())。
1 | void Keyboard::resizeButton() |
触发切换大写状态,遍历设置每个按键的switchCapsLock()函数。
1 | void Keyboard::switchCapsLock() |
KeyButton的switchCapsLock()函数切换按键显示的内容。
1 | void KeyButton::switchCapsLock() |
当创建按键的同时也会绑定AbstractKeyboard的onKeyPressed槽函数。
1 | KeyButton *button = new KeyButton(modes, this); |
使用QApplication的sendEvent发送按键事件到焦点窗口。
1 | void AbstractKeyboard::onKeyPressed(int key, QString value) |
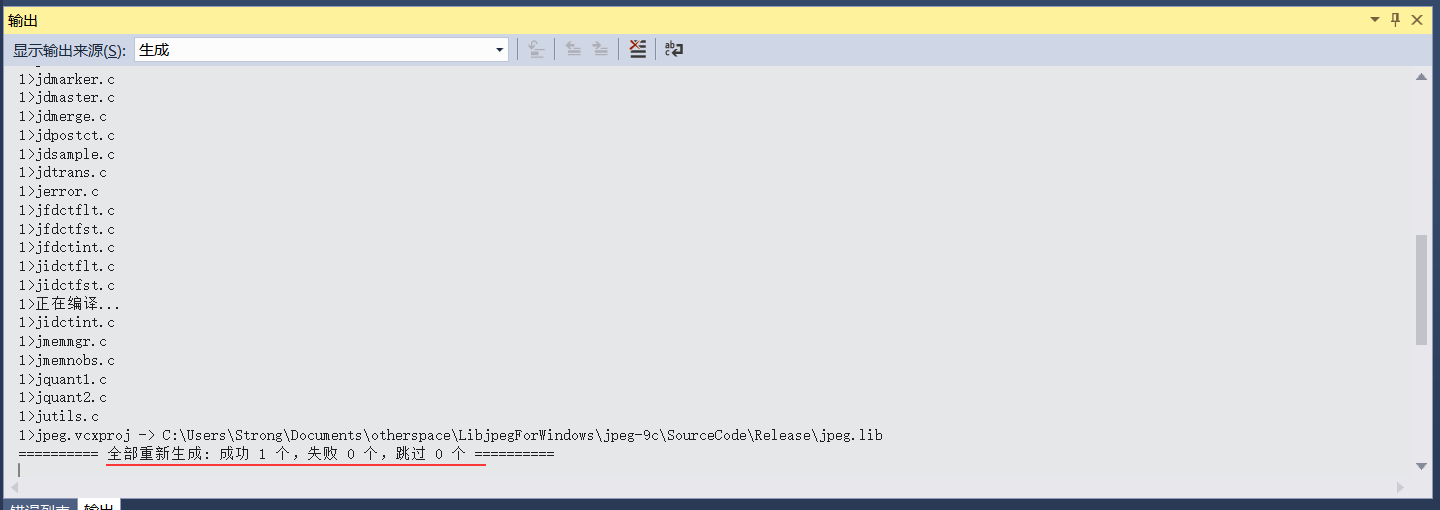
Qt君最近在做图像相关的项目,用到了libjpeg库。记录libjpeg编译步骤供大家参考。
1 | http://www.ijg.org/ |
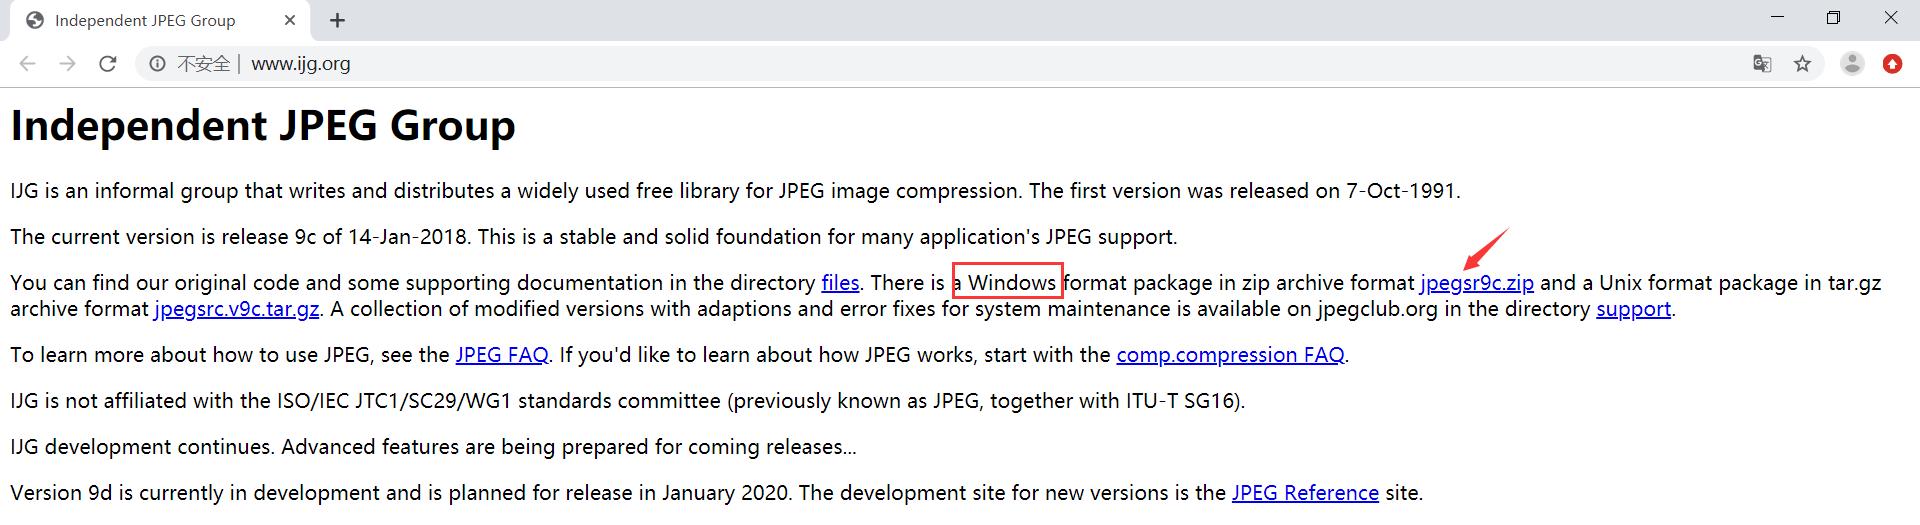
jepgsrc9c.zip源码包下载地址:
1 | http://www.ijg.org/files/jpegsr9c.zip |
如上的下载地址失效可以使用Qt君的github仓库下载:
1 | https://github.com/aeagean/LibjpegForWindows/blob/master/jpeg-9c/jpegsr9c.zip |
下载的源码中有一个编译安装教程文件(install.txt)
从install.txt中摘取的VC++6配置编译方法:
1 | Microsoft Windows, Microsoft Visual C++ 6 Developer Studio: |
从install.txt中摘取的VS2017配置编译方法:
1 | Microsoft Windows, Visual Studio 2017 (v15): |
由于VC++6的编译方法与VS2017方法基本相同,这里使用VS2017的编译环境编译。
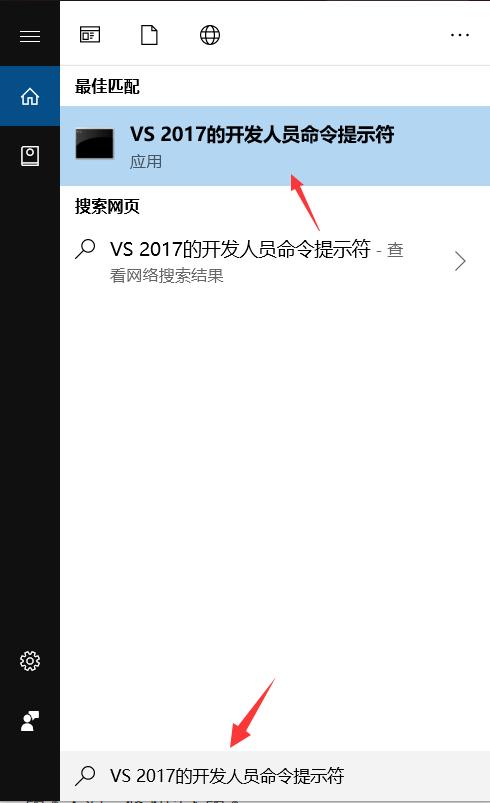
图示: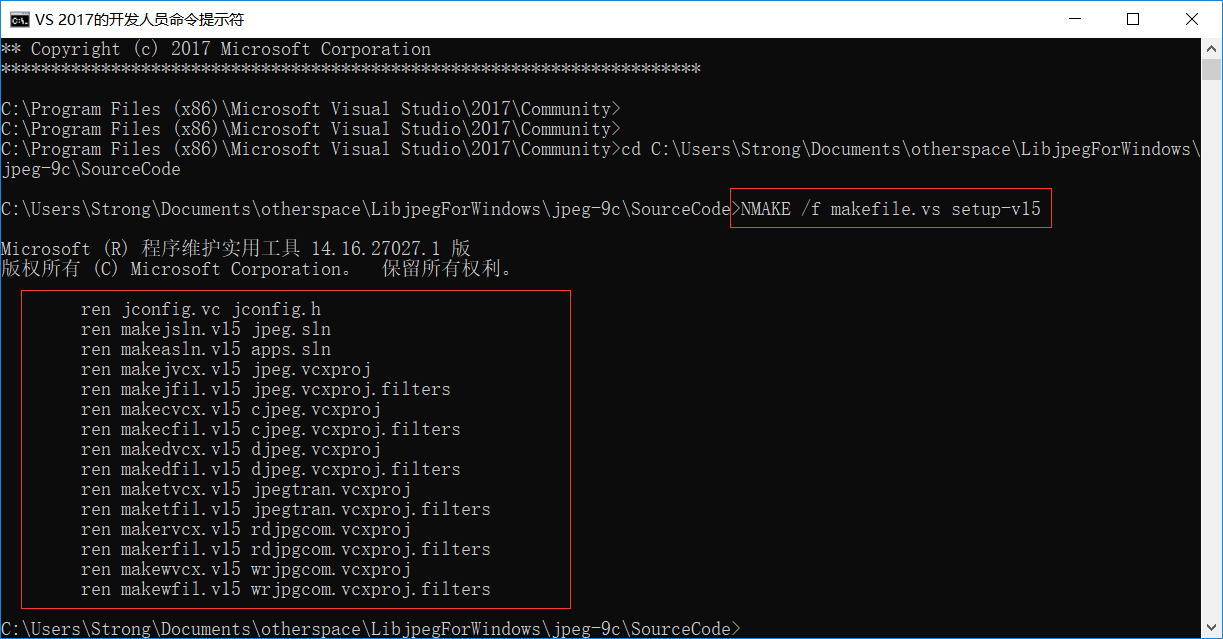
命令:1
NMAKE /f makefile.vs setup-v15
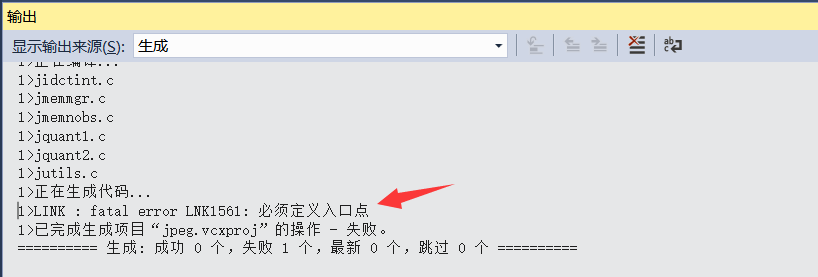
这一步可能遇到的问题:如果出现以下情况,可能是你重复调用命令生成,导致文件不能重命名,或你修改了里面的一些文件名字。建议重新解压libjpeg库再执行命令生成。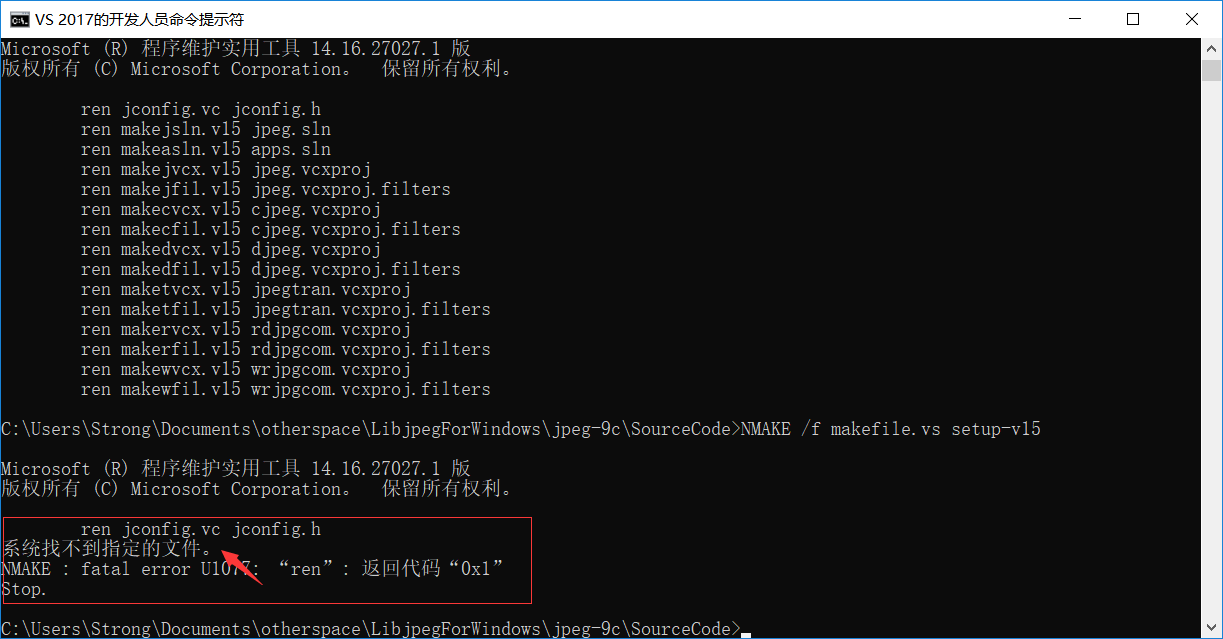
这一步可能遇到的问题:1
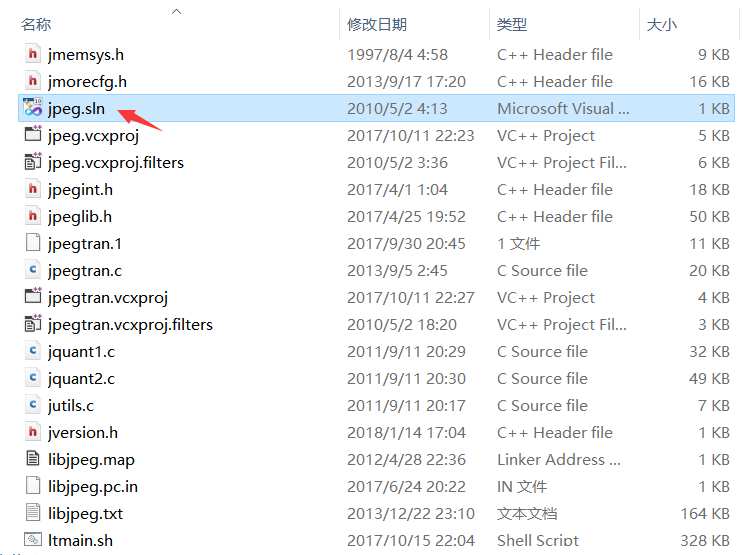
2jpeg.vcxproj.filters : warning : 无法读取筛选器文件“jpeg.vcxproj.filters”。请卸载项目“jpeg.vcxproj”以便对其进行编辑。
jpeg.vcxproj.filters(1,1): 未能加载项目文件。根级别上的数据无效。 第 1 行,位置 1。
解决方法:
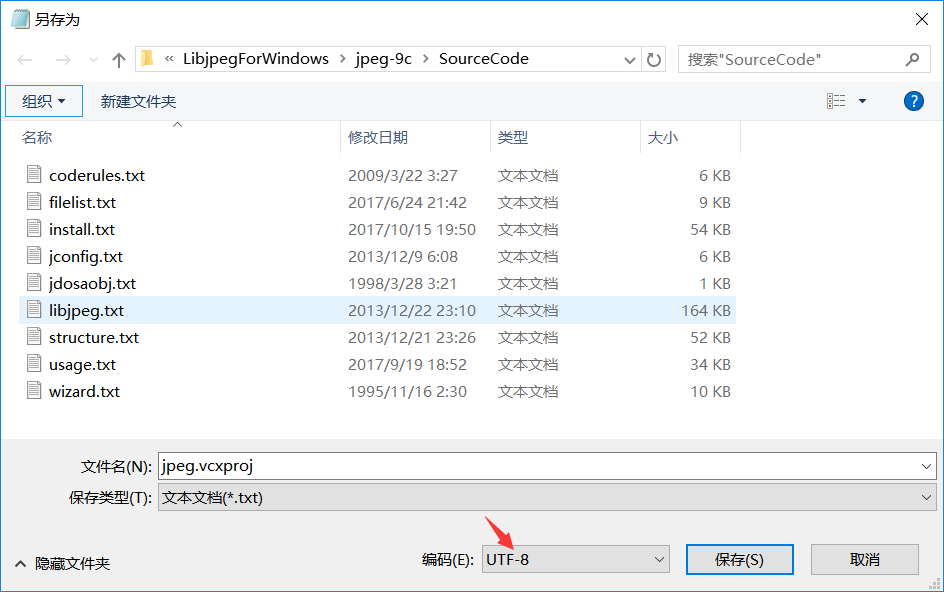
这一步可能遇到的问题:

解决方法:修改Windows SDK版本: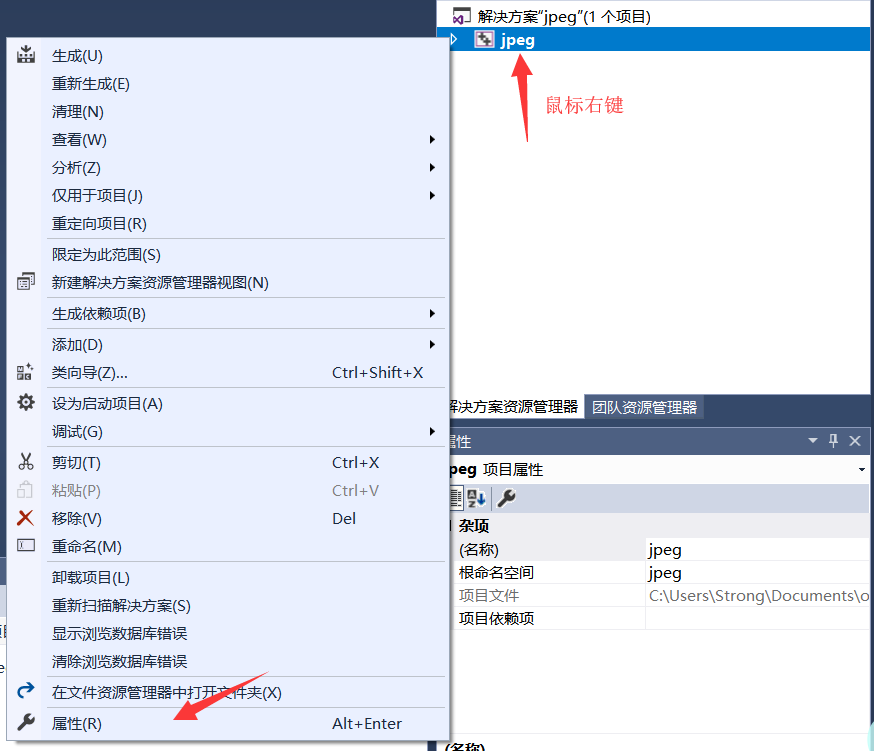

解决方法:设置动态库或静态库: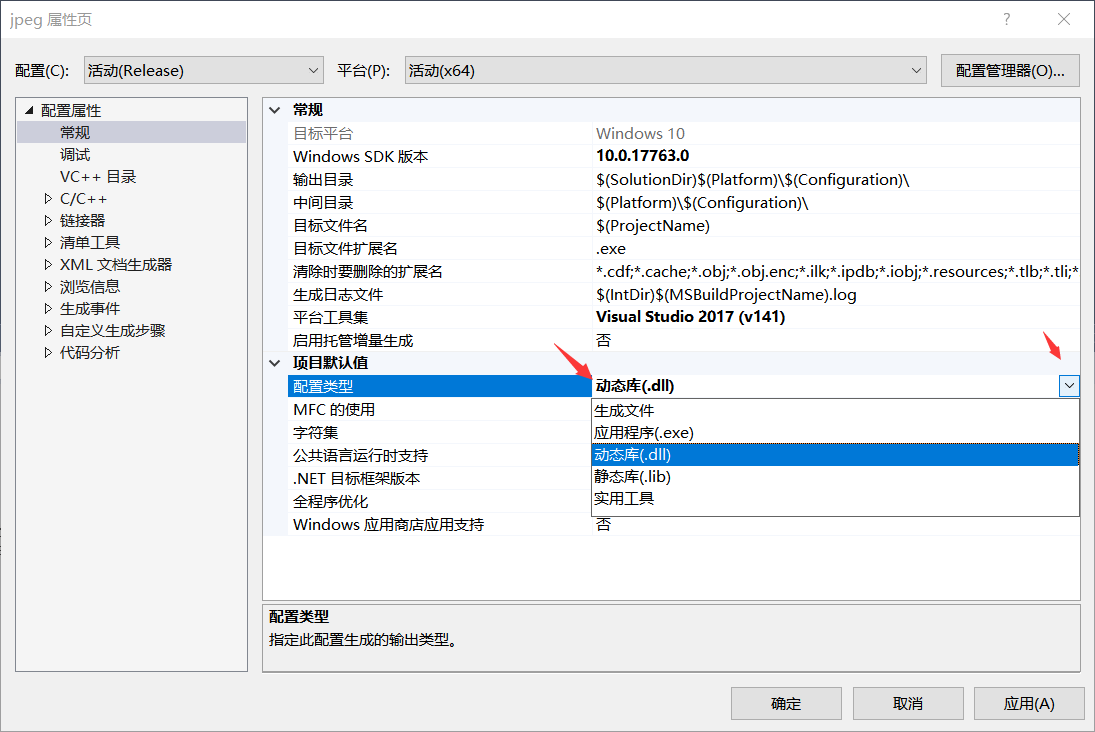
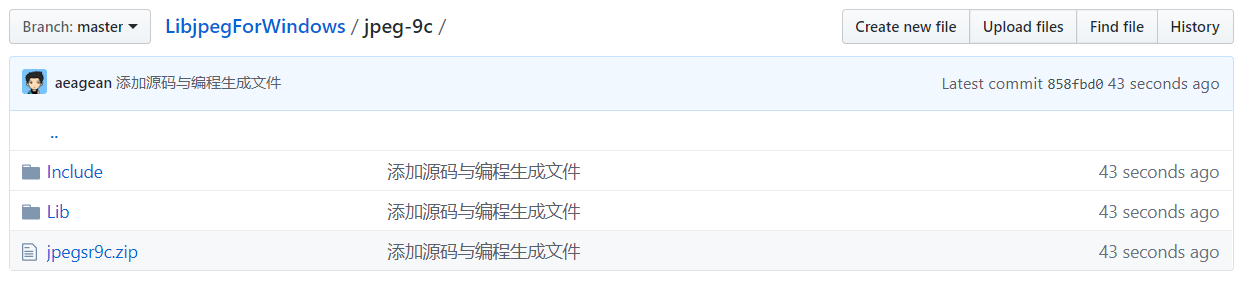
1 | https://github.com/aeagean/LibjpegForWindows |
列举使用到的一些git命令。
切换到某个分支
git checkout 分支名
查看分支
git branch -a
分支切换并创建
git checkout -b 分支名 提交ID
删除本地分支
git branch -d 分支名
删除远程分支
git push origin –delete 分支名
推送远程tag
git push origin tag名字
本地删除tag
git tag -d tag名字
1)只合并一个commit(将分支2的提交id合并到分支1)1
2git checkout 分支1
git cherry-pick 分支2提交id
2)合并连续的多个commit到指定的分支上(将分支2的范围commit合并到分支1)
为分支2创建一个临时的最后范围commit的分支
1 | git checkout -b temp 最后范围commit |
将tmp分支最开始范围的commit用rebase合并范围commit
1 | git rebase --onto 分支1 最开始范围commit |
列举使用到的一些git命令。
| 作用 | 命令 |
|---|---|
| 显示某次提交的修改内容 | git show <commit_id> |
| 显示某次提交的某个文件的修改内容 | git show <commit_id> <文件> |
| 显示以前每一次提交的修改内容 | git log -p <文件> |
| 显示n次前提交的修改内容 | git log -p -n <文件> |
| 恢复到某个文件的状态 | git checkout <commit_id> <文件> |
| 比较某个文件的两个历史记录 | git diff <commit_id1> <commit_id2> <文件> |
| 取消合并操作 | git merge --abort |
| 将当前内容暂存到缓存区 | git stash |
| 将缓存区内容取出 | git stash pop |